
Dependency Manager in Swift
All iOS developers in their tenure of development must have come across situations where adding a third-party library seemed easier than writing the code itself. In this article we will discuss about the different ways of adding support of a third-party library in your iOS Project.
What’s covered in this article
- Need for adding a third-party library
- Ways to add support for third-party library
- Doing it via Carthage way
- Doing it via Pod way
- Doing it via Swift Package Manager (SPM)
Need to add a third-party library
Ever wondered why there is a need to include a third-party support in your project when you too can write the same code inside your app? Well, yes! You are correct. You are capable enough to write the code on your own, but then it will obviously take some time and will require a full-fledged end-to-end testing. Instead, wouldn’t it be great if that task is done by someone and we can quickly integrate it? That would save a lot of time, won’t it?
Let’s assume you want to include the animations in your app just like in Airbnb application. What do you think will be a better option – to write the whole code on your own or just implementing a tried and tested code in few minutes? Obviously, you would go with the latter solution.
Now, we will look at how we can add the support for any third-party library in our own application. For purpose of ease, we will integrate lottie third party library which is used to provide animations on design components.
Different ways to add support for a third-party library
If you want to install any third-party library the first step is to visit its directory page. You can search that library on Google and you’ll get the official link for GitHub. Normally, every third-party library has installation steps listed in their documentation.
Let’s go through lottie-iOS GitHub page and go through its README.md file for installation steps.

Here you can clearly see that there are three ways mentioned on how to install it.
- Via CocoaPods
- Via Carthage
- Via Swift Package Manger
We will go through each method one by one.
COCOAPODS
CocoaPod was the first way which made it easier to work with other dependencies.
Some Interesting facts about CocoaPods
- CocoaPods was the first dependency manager for the Cocoa and Cocoa Touch.
- As it is written in Ruby, it has to be distributed as a Gem. You will need a compatible version of the Ruby language for CocoaPods.
- CocoaPods has a Centralized approach which means that CocoaPods has a repository (on Github) that maps the name of a Pod (the name libraries receive on CocoaPods) with the location of where to download that Pod. This is what we call the spec repo.
- The advantage of having a centralised approach is that you have a common place where you can store the metadata of all the available libraries on CocoaPods. In turn, this provides a simple way to search for libraries.
- The drawback is that if something happens to that repository you won’t be able to resolve your dependencies.
How to use CocoaPod to install any dependency
- First you need to clone CocoaPods specs repo on your local machine. This can be done by below command

- For a fresh project when pod file is not yet created, we need to create a pod file. This can be done via terminal by running the below command which in turn will create a pod file.

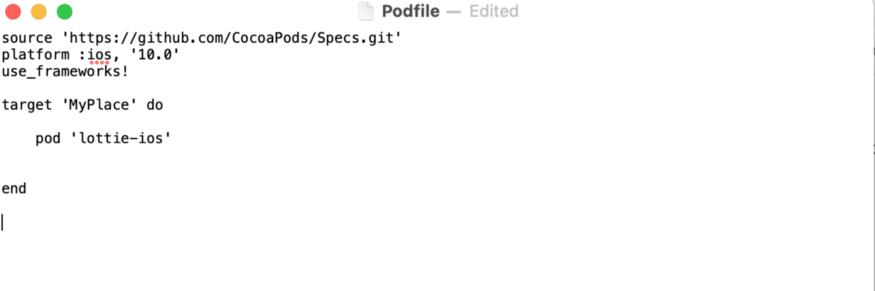
- Once the pod file is created it will look something like below. Now in this pod file we need to add the name of the pod that we need to integrate and save the file. As in our case let’s add the lottie pod.
- Now we are ready to install our pod via the below command.

4. And that’s done!! You can see that CocoaPods has created a Xcode Workspace directory, which has .xcworkspace extension where it builds all the dependency. We have to use Xcode workspace in order to make CocoaPods work.
So that’s how we can use CocoaPod to integrate any dependency. Now let’s see how the same can be done via Carthage.
Carthage
Carthage is another way via which we can manage the dependency, although it is not as famous as CocoaPods for the developers.
Some Interesting facts about Carthage
- Carthage is very different from Cocoa Pods. It is written in Swift, not Ruby.
- Carthage is decentralised. There is no place where you can go and search for libraries like you can do with CocoaPods. To find your dependencies you will have to rely on Github or Google.
- Carthage will only download and build your libraries (using xcodebuild). You will have to manually install each of those libraries into your project.
- In Carthage, instead of a Podfile we have a Cartfile and a Cartfile.private. The Cartfile lists all the dependencies that you want to use in your app.
How to use Carthage to install any dependency
- Install Carthage on your local system using below command

2. Create a cart file using terminal

3. Open the cart file and add the dependency that you need to install and save it.

4. Now we need to install the dependency.

Here, by default the Carthage will install the dependency for all platform such as iOS, WatchOs, tvOS. But it takes a lot of time. In case you want the dependency only for a particular platform you can do that by specifying the platform.

Carthage won’t touch Xcode settings or Project files. Carthage will leave it to you to add the binaries to Xcode.
Once the binaries are downloaded you can see that there is a Carthage folder that again contains two sub folders.
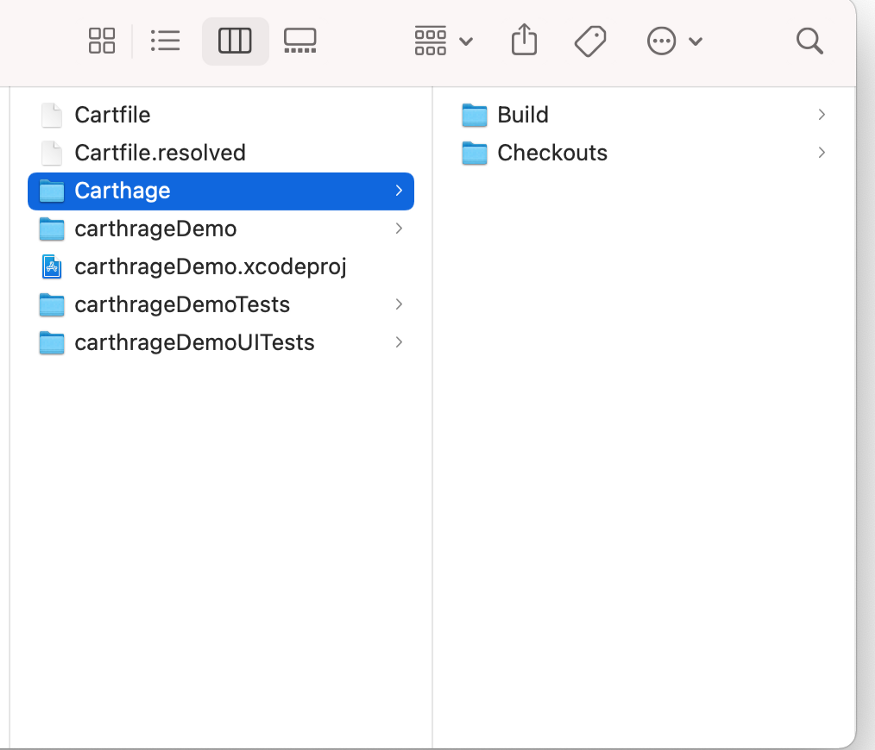
- Build: This contains the built framework for each dependency. You can integrate these into your project, Carthage either builds each framework from source or downloads it from the project’s Releases page on GitHub.
- Checkouts: This is where Carthage checks out the source code for each dependency that’s ready to build into frameworks. Carthage maintains its own internal cache of dependency repositories, so it doesn’t have to clone the same source multiple times for different projects.
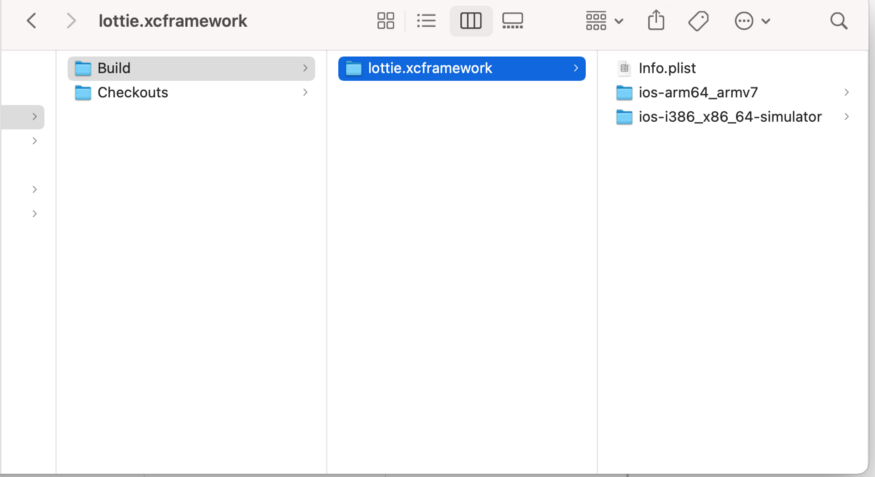
Now here comes one manual process where we need to add the xcframework to linked binaries in your xcode.
- Go to your project directory -> Carthage folder -> Builds -> .xcframwork (this is the frame work that we need to bind with our xcode)
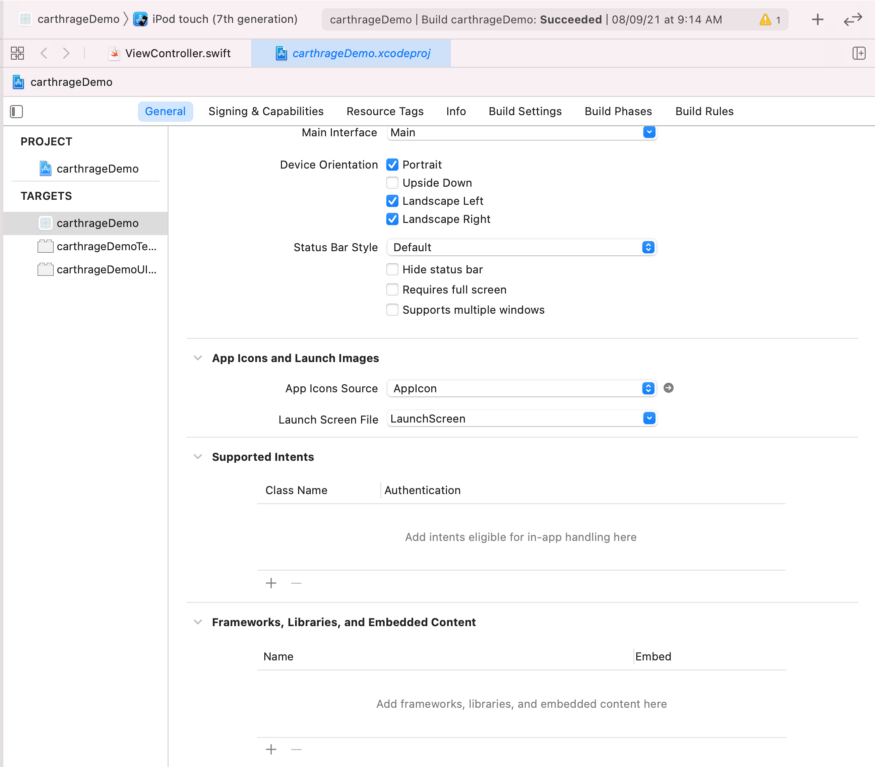
2. Open Xcode -> General -> Framework, libraries and embedded content > Drag and drop your .xcframework here and it’s done.
This is how we work with Carthage. The best advantage of Carthage over CocoaPods is that it doesn’t compile the dependencies every time the code is compiled or cleaned. It compiles when we install/Update the dependencies.
Swift Package Manager
The latest in town for the developers is Swift Package manager or SPM or SwiftPM.
Some Interesting facts about SPM:
- Swift Package Manager (SPM) was introduced with the release of Swift 3.0.
- It was initially only available for server-side or command line Swift projects. Since the release of Swift 5 and Xcode 11, SwiftPM is compatible with the iOS, macOS and tvOS build systems for creating apps.
- The good news is that it is shipped with Swift, so it comes pre-installed.
- It’s designed to automate the process of downloading, compiling and linking the dependencies.
- It’s decentralised (like Carthage) and open source (like CocoaPods and Carthage).
- Swift package is a collection of source code files and a manifest file called Package.swift
- SPM can run on Linux as well which makes it stand out from CocoaPods or Carthage.
How to use SPM to install any dependency
Since it comes pre-installed so we don’t need to install any other library. This can be done via Xcode only.
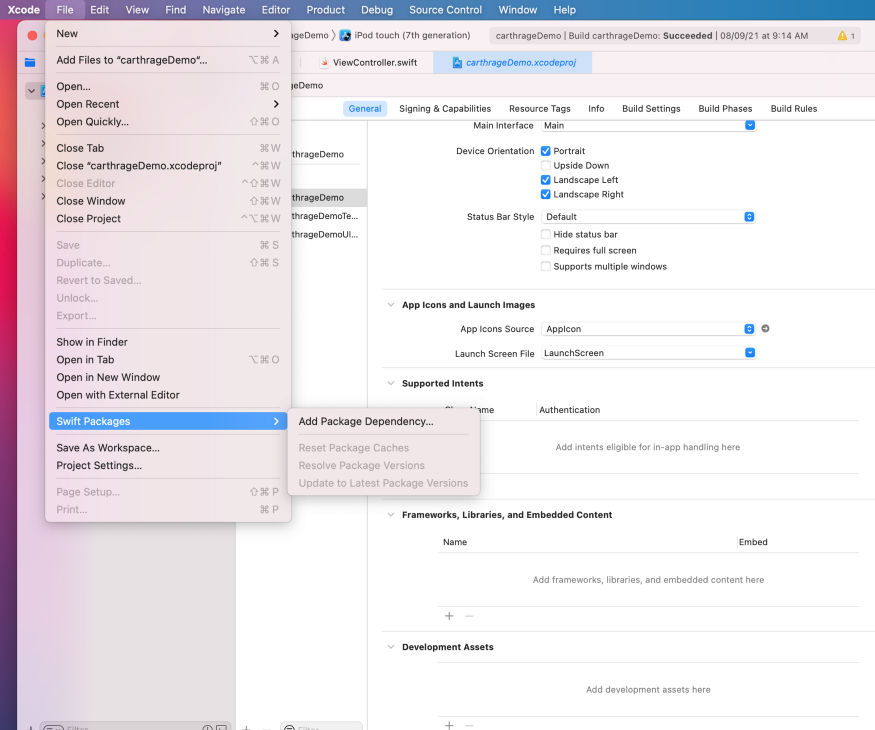
- open Xcode -> Go to file > Swift Packages >Add Package dependency
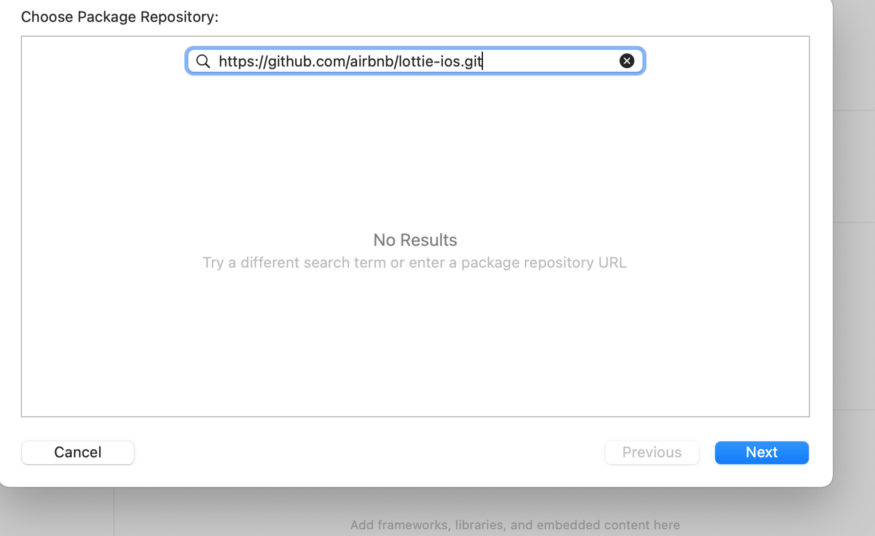
2. Enter the git url for the branch. You can find this in installation documentation and tap next.
3. Here you choose custom configuration such as branch, version
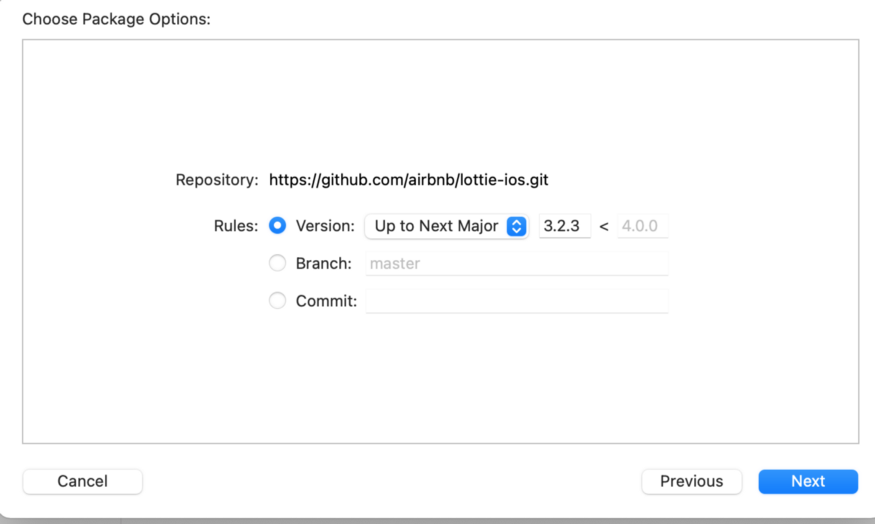
4. Tap next and it’s done.
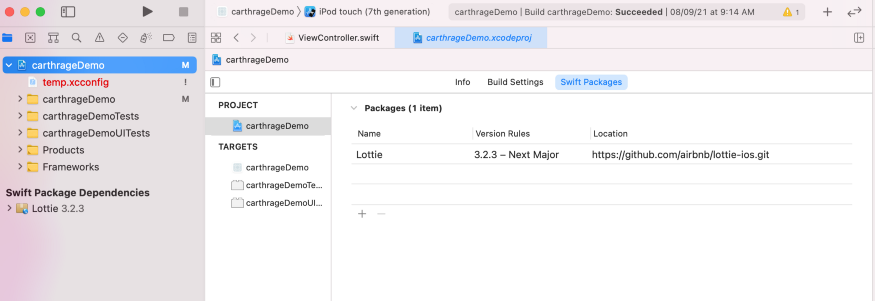
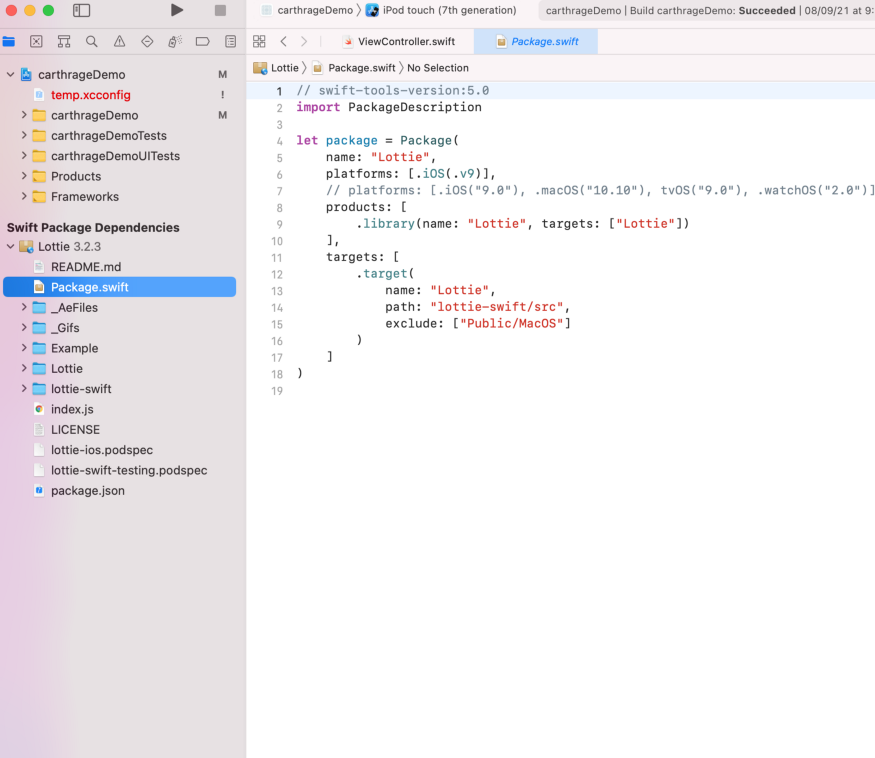
Now you can see that Xcode has added one more tab for Swift packages where we can find all the details regarding the dependency.
There is one more file created i.e. Package.Swift
With this we covered all the possible ways of working with third party libraries. Every method has their own limitations along with advantages so it is up to the developer which method they want to use.
Author – Shivangi Gupta
Article Source – Medium.com


No Comments